Arlo Go 2 Camera Product Tour
The Arlo Go 2 Camera has the following integrated features:


- Microphone: Use the microphone and speaker for a full-duplex two-way conversation.
- Spotlight: Activate the integrated spotlight manually, or set it to trigger when motion is detected. For more information, visit: How does the spotlight on my Arlo camera work?
- Camera Lens: Keep an eye on more of what matters with a wide 130-degree field of view.
- Status LED: Determine the status of your Arlo Go 2 Camera by referring to the LED indicator. For more information, visit: What do the LED behaviors on my Arlo Go 2 Camera mean?
- Light Sensor: The light sensor is used to determine when to trigger the integrated spotlight. For more information, visit: How does the spotlight on my Arlo camera work?
- Speaker: Use 2-Way Audio to have a conversation, or deter intruders by activating the siren. For more information, visit: How do I turn the siren on my Arlo camera on or off?
- Sync Button: After releasing the camera from the camera housing, manually start the syncing process or factory reset your Arlo camera by pressing this button. For more information, visit: What is the sync button on my Arlo Go 2 Camera?
- Weather Resistant Camera Housing: Use your Arlo Go 2 Camera indoors or outdoors. For more information, visit: Are Arlo cameras weatherproof?
- Charging Port: Charge your camera battery with the magnetic charging cable that came with your camera.
- Release Button: Press this button to release your Go 2 camera from the camera housing. This lets you access the battery and the SIM card, the sync button, and the SD card slot. For more information, visit: How do I insert the battery in my Arlo Go 2 camera?
- SIM Card Slot: An activated SIM card is required for mobile broadband access. For more information, visit: How do I install a SIM card in my Arlo Go 2 camera?.
- SD Card Slot: You can use an optional micro SD card (sold separately) for local storage. For more information, visit: How do I install an SD card in my Arlo Go 2 camera?.
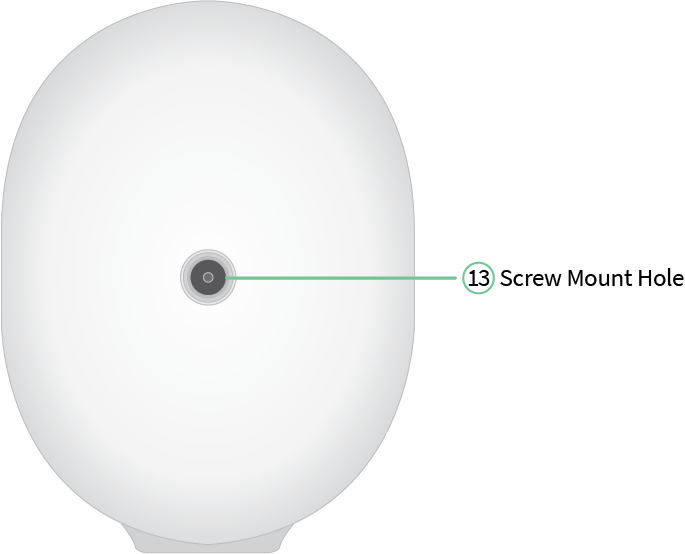
- Screw Mount Hole: Use the screw mount hole to attach your camera to the camera mount. For more information, visit: How do I mount my Arlo Go 2 Camera?